Chair restoration project
First published . Last updated .The chairs
I bought some chairs recently. According to the family I bought them from, they are already about 120 years old, and were originally from a restaurant.
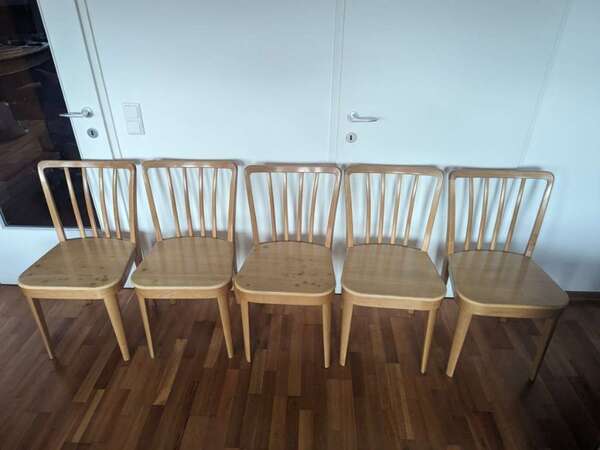
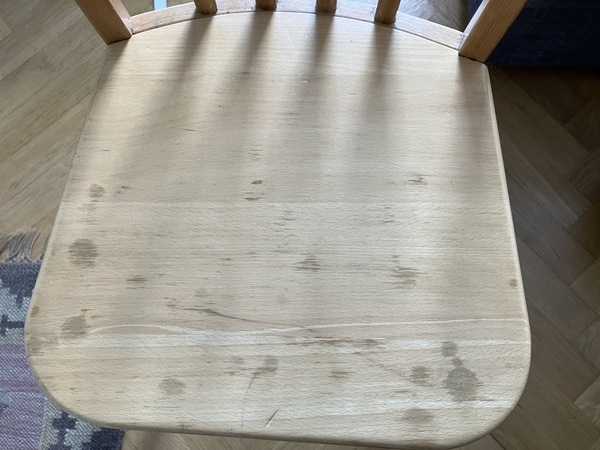
Some of them were in rough shape. Someone had already replaced all the seats at some point, but even the new seats were scratched up. Three of them also had spots which were apparently caused by a caustic cleaning solution that dripped onto them when someone was cleaning a ceiling after a fire. And most were rickety.
Nevertheless, the sellers highlighted the “old carpenter things” and the chairs were fundamentally sound. I needed chairs so I bought them and set about restoring them.
Regluing the joints
The chairs were rickety because the glue in the joints was no longer holding them.
I followed the advice in this video to take them apart and reglue the joints.
The back
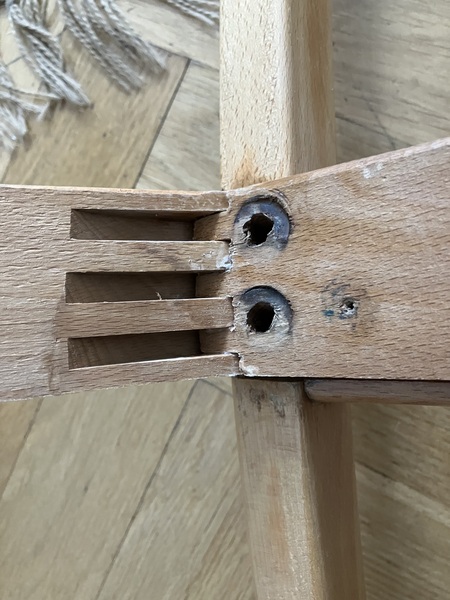
The frame of the seat is made from just two pieces: one long bent pieces that wraps around the front legs, and one short piece that joins the two ends at the back. The short piece is joined to the long piece with a triple mortise-and-tenon joint.
The seat frame is fixed to the back of the chairs by four bolts. The holes for the bolts were drilled right through the joints, which significantly weakened the tenons in a few places. A couple of the tenons have broken as I took the frames apart. For now I’ve just reglued all pieces into place, but if they become rickety again quicky, I’ll have to replace at least the back side of the seat frames.
This project has made clear to me how important leverage is in woodworking. I could pull the legs of the chair and see the back piece moving in the joint, so I knew it needed to be reglued. But once I took the legs off, the joint still seemed very tight; without the leverage of the legs, I couldn’t move it with my hands. Yet when someone sits in the chair, the legs provide this leverage, transferring the weight of the seated person (at least partly) to the joint. So the joint has to be strong.
The front legs
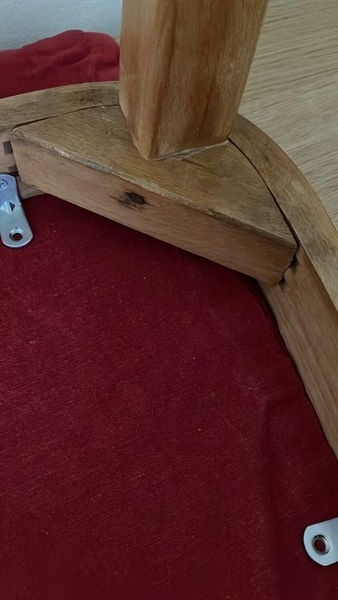
At the front of the chair, the legs are doweled into a couple of triangular cross pieces which are themselves glued into the frame with a mortise-and-tenon joint.
The original carpenter drove a nail through the cross piece into the doweled part of each leg. This was a nice touch that prevented the dowels from rotating in their sockets.
Unfortunately, it meant I had to pull the nails in order to pull the legs out. This turned out to be a challenge with 120 year old nails. In the end I had to chisel out around the nails before I could get enough leverage on them to remove them.
I replaced the nails with screws, which will hopefully make this repair easier the next time it’s needed. I didn’t bother to pretty up my chisel job, though.

Refinishing the seats
The seats have been straightforward to restore. Sand off the lacquer and the flecks and the scratches, apply new finish. Some of the spots from the cleaning solution were surprisingly deep.
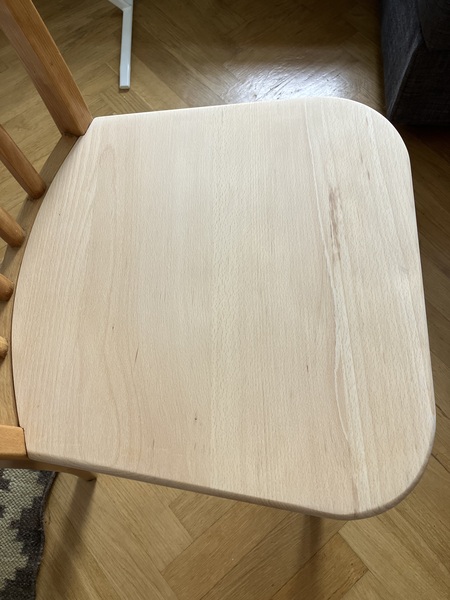
I decided to refinish the seats with “Hartöl” (“hard oil”), an oil product recommended to me at a repair cafe here, because it was a good match for the color and I already had it on hand. It is apparently a mixture of oil and resin, and dries quicker than a pure oil finish.
On the first seat I refinished, I applied a stain-and-polyurethane mixture that looks good on the legs of a sidetable I’ve got, which are also made of beech. I didn’t like the color as much, but I’m leaving it for now because I won’t need all five chairs very often, and who knows, I might end up refinishing them again at some point.
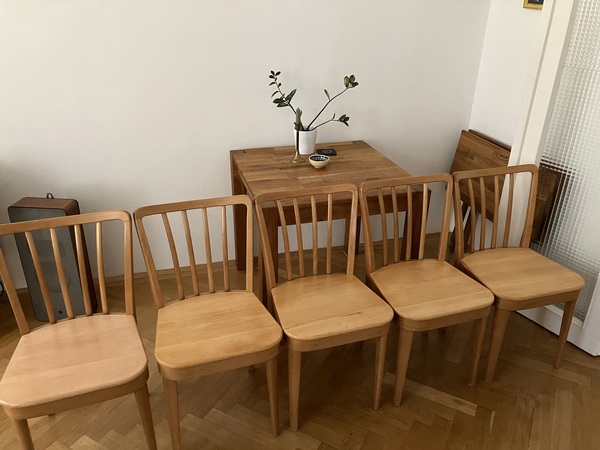
The result
It was more work than I expected, but I now have five chairs that stand stable, look good, and will hopefully last another 120 years:
They didn’t turn out perfect, of course. I made a few mistakes over the course of the project and had to learn from them:
- While sanding down the first seat, I got overeager with the belt sander and ended up flattening the curve on the edge. I had to correct it with a table router before I could reassemble the chair.
- I initially neglected to reread the application instructions on the Hartöl and let it dry on one chair for too long between coats, leading to a finish that was tacky and took days to fully dry (though it came out a bit glossier).
- In my first attempts to remove the wobbly front legs on a chair, I hit my finger so hard with a wooden mallet that I might have fractured it (I’m not sure, since the swelling went down after a couple of days…).
I’m a long way from being a professional but I’m happy I got this far.