Reviving Ivar, parts 2 and 3
First published . Last updated .Return for re-fun
It has been quite a while since Part 1. I decided back then that I wanted to use the remaining material to make a proper shoe rack, and had gotten started on that. But at some point, I noticed my own incompetence, got discouraged, got busy, and then it sat mouldering for a while in the basement. (Literally, alas: our basement storage unit is not the driest of places.)
But a month or so ago I got back to the project. I bought a new (old) laptop this summer and wanted once again to be able to work at a standing desk. Long ago, I’d already built a standing desk add-on out of pre-fab pieces I bought from IKEA, so this seemed like a natural application for the material I already had. I decided that I just wanted to learn something and get something useful out of it, and all that got me back into the workshop.
Ivar rises again
I made some measurements, cut the remaining pieces of legs (the rest was reserved for the shoe rack), and made a very simple shelf for my laptop. Now I can work standing again, for the first time since I left California and my old standing desk with it.
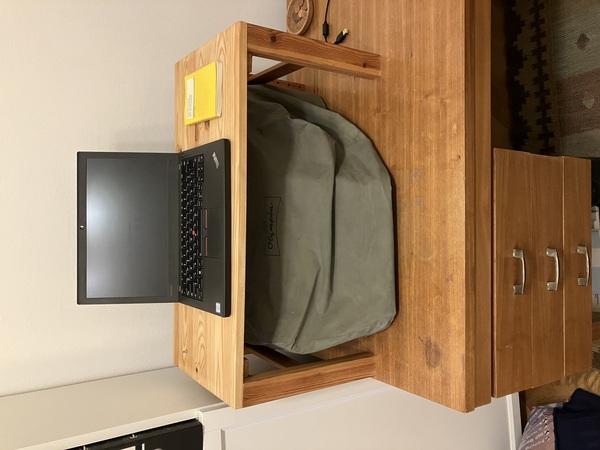
I decided to go for a very simple joint, just resting a crosspiece on a small cutout at the top of each leg. I made the cutouts with a handsaw and chisel. I’m no master with either and the soft, cheap wood didn’t make it easier. But I’m happy enough with how they came out. This little stand sits stably on my desk. It does its job well, even if I haven’t held up my side of the working relationship. I finished it with “Hartöl”, like the chairs.
By the way, that gray cover underneath is hiding a beautiful Olympia SG1N typewriter that my friend Anna gave me for my 40th birthday, which I need to do some work on and then write up here at some point. Here it is in all its glory:
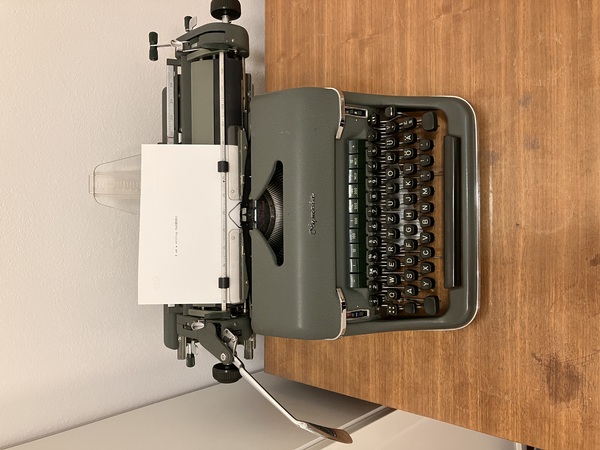
I made the standing desk partly so I could leave this beauty on the desktop and still recover the (substantial) workspace it takes up. I keep both over the drawers of the desk, so they’re not in front of me while I’m sitting, leaving the rest of the desk free for non-computer work.
The shoe rack, finally
Before I could finish the shoe rack, I needed to solve the problem where I got stuck: how to attach the shelves to the legs in a way that didn’t suck.
I had already cut notches into most of the boards I salvaged, planning to just fit them between the existing legs. But I didn’t cut the notches carefully enough, so there were some gaps, and I also couldn’t come up with a simple way, with the material I had, to attach cross-pieces to the legs for them to rest on.
What finally breathed new life into this project was, funnily enough, another dumpster find: a couple months ago, at the very same spot, perhaps even the same family had dumped an IKEA crib. I took the two end pieces home immediately, thinking they would make better shelves for the shoe rack than what I already had, because the dowels would allow wet soles to dry better, and because they’re decent beech, not whatever species of cheap pine the IVAR boards were.
I still had the problem of attaching them, but newly emboldened by my handwork with the standing desk, I bit the bullet and just hand-chiseled notches for them all. I was more careful not to take away too much material, and in the end I managed a pretty snug fit for them all:
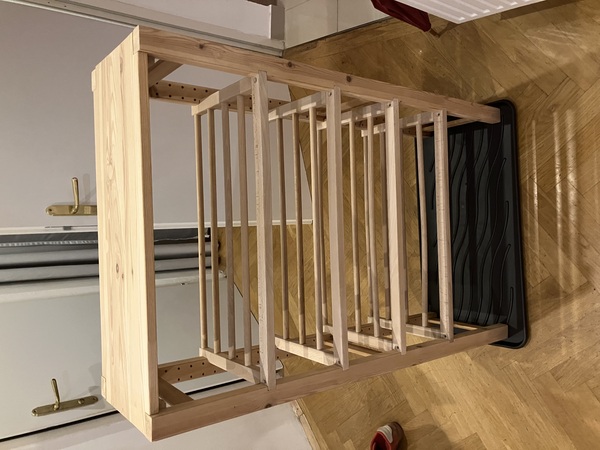
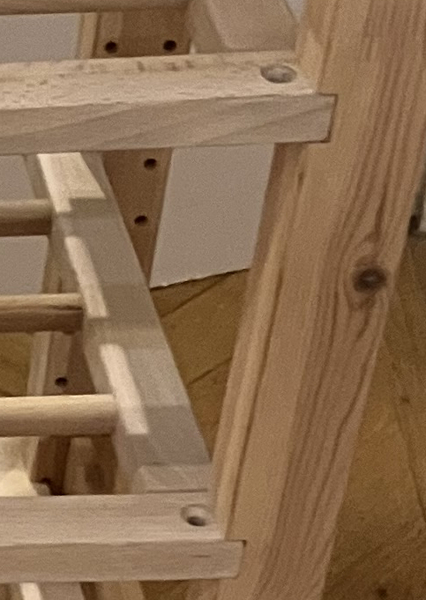
I made a few stupid mistakes here. I hastily mounted the shelves in the legs backwards, so that the scratched-up side of the legs faces forward. I drilled a couple of screw holes for the top shelf too deep, too. The main thing this project has taught me, I guess, is that woodworking requires a lot more patience than, say, programming. When you program, mistakes are annoying but easy and free to fix, and the feedback loop is quick. In woodworking, you’d better go slow and make sure you get things right the first time. Otherwise you might get an extra hole you didn’t want, or you might not notice something is backwards until the glue is dry.
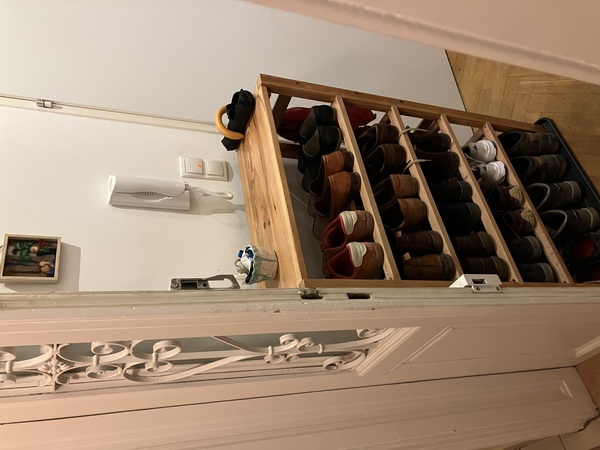
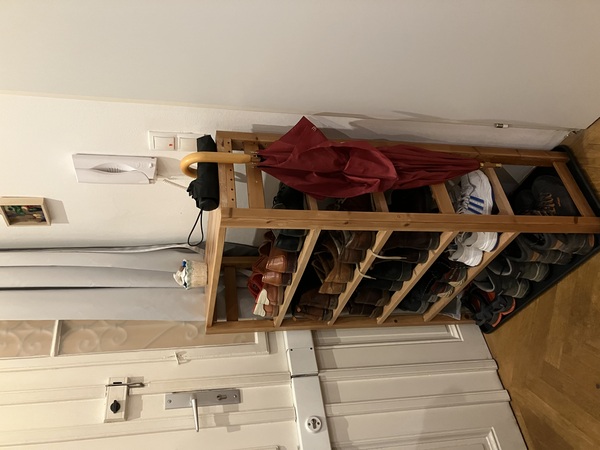
So it’s far from perfect. My joinery will certainly not be winning any awards, and if you use my own salary to convert the time I put into this, it’d probably buy a hundred(??) new IVARs. But saving money wasn’t the point. I now have a few perfectly functional pieces of furniture that are built much more solidly than the originals I salvaged, and I learned something. And there’s space for most of the shoes that have been piling up in the hallway, too.
Postscript
Helena and I were in Sweden this year on vacation, and on the way back, the train connections made it convenient to stop over in Älmhult, home of the original IKEA store, which is now the company museum, and—well, not much else, really. It’s a company town, and has a bit of an outpost feel to it. So we visited the museum, which I was expecting to hate, but it was free and there wasn’t really anything else to do. It is of course filled with IKEA propaganda, but nevertheless, I came out feeling better about the company than when I went in. It seems they actually do quite a lot to work toward making their own products more sustainable, while also keeping them cheap enough for working people to afford. It’s too bad those same working people have a tendency to leave their (perfectly reusable!) IKEA products by the next dumpster. But that isn’t entirely IKEA’s fault. Nor is it theirs, to be clear: a family living in social housing with a baby is, I’m pretty sure, unlikely to have the time and resources to repurpose their collapsing IVAR into something better in the local workshop. But it can be done, and as long as people who do have the resources can get those IVARs from the curbside, I hope they will.
We’re a long way from a “circular” economy. But at least I’ve put my thumb on the curve.